PS5 Controller Repair: Fix a DualSense by Part, Not by Guess
PS5 controller repair means replacing the one worn part inside a DualSense, a stick module, an adaptive trigger, a conductive pad, a haptic actuator, a cable, or the battery, instead of buying a whole new pad.
PS5 controller repair decided by what is actually broken. Diagnose the DualSense fault in 30 seconds in your browser, then choose repair or replace by part and cost.
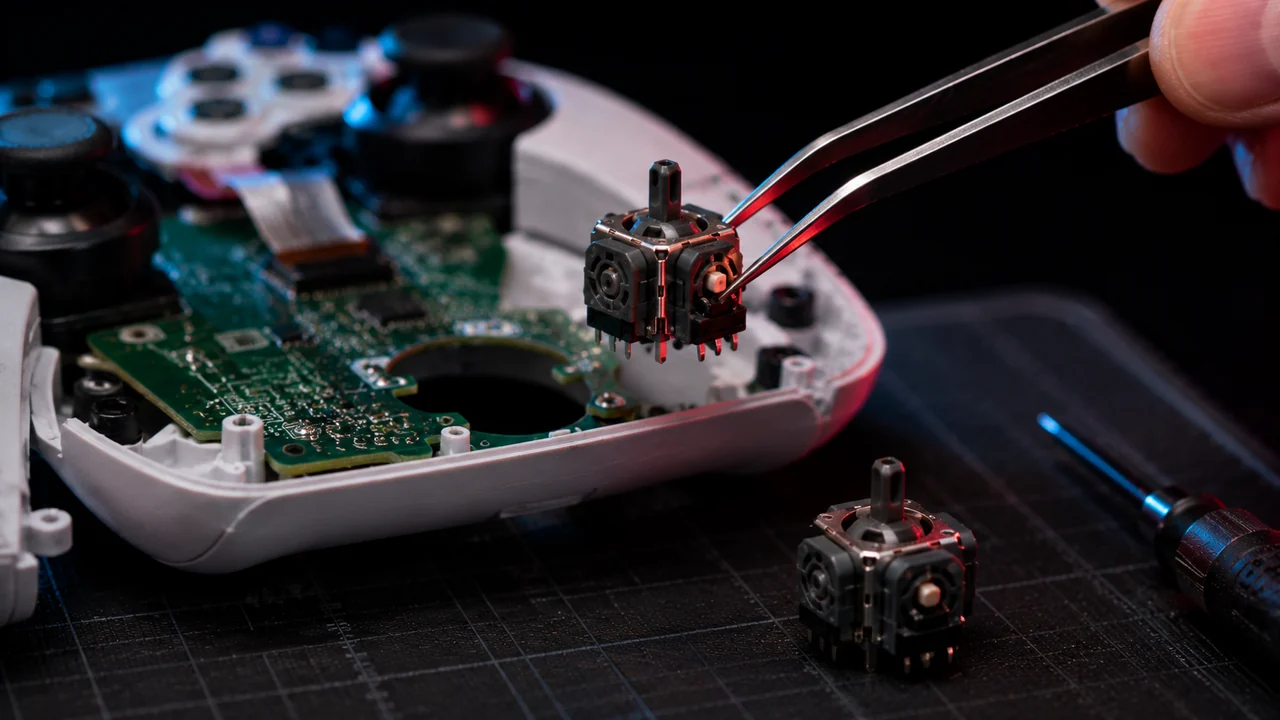

PS5 controller repair means replacing the one worn part inside a DualSense, a stick module, an adaptive trigger, a conductive pad, a haptic actuator, a cable, or the battery, instead of buying a whole new pad. Almost every DualSense fault is a single part.
The expensive mistake is ordering parts before you know which part failed. A two-minute test settles it. Rest the controller flat in the PS5 controller test, watch what the hardware actually reports, and let the measured fault decide repair or replace.
One fault, one part — and the blind spots
- A DualSense fault is usually one part: a stick module, an adaptive trigger, a conductive rubber pad, a haptic actuator, a flex cable, or the battery.
- Diagnose before buying. A browser tester reads the Gamepad API and confirms drift, dead buttons, trigger range loss, and a stuck D-pad in roughly 30 seconds.
- Know the blind spots. The Gamepad API cannot see battery health, haptic wear, adaptive trigger resistance, or liquid damage, so those need a hands-on check.
- Adaptive triggers fail in two distinct ways, and the tester tells them apart: lost resistance is the motor, lost pressure range is the sensor.
- A DualSense costs more to replace than a DualShock 4, so repair wins at a higher fault count than it did on the older pad.
The DualSense is a serviceable controller with documented internals. iFixit publishes a teardown and parts documentation for the standard DualSense, and separately for the DualSense Edge, which uses stick modules that Sony sells as an individual replaceable accessory rather than a soldered-in component. The Edge stick module is the only officially user-replaceable analog stick in the PlayStation line.
Source: iFixit, Sony DualSense controller teardown and repair documentation
Narrow it to a single part first
- Open JoyCheck or any browser-based gamepad tester in Chrome, Edge, or Firefox.
- Connect the DualSense over USB-C, or pair it over Bluetooth, then press any face button to wake the Gamepad API.
- For drift: set the controller flat on a table, hands off both sticks, and read the analog X and Y values. They should sit at or near zero.
- For buttons: press every face button, the D-pad, L1 and R1, and click the touchpad. Each should light its indicator once and release cleanly.
- For triggers: pull L2 and R2 slowly to the stop. The pressure reading should travel from 0 to full and back. A reading that never reaches full is a worn trigger sensor.
What breaks most often on a PS5 controller?
The most common DualSense failures are, in rough order, analog stick drift, adaptive trigger faults, worn conductive pads under the face buttons or D-pad, a battery that no longer holds a session, and haptic actuators that buzz weakly or fall silent. Each maps to a specific part with its own cost and difficulty.
This matters because the symptoms overlap in how they feel but not in what they need. A pad that “feels wrong” could be drift, a dead button, a trigger that lost range, or a trigger that lost resistance. Those are four different parts.
Here is the symptom-to-part map.
| Symptom you notice | Likely DualSense part | Can a browser tester confirm it? | Repair difficulty |
|---|---|---|---|
| Camera or character moves with your thumb off the stick | Analog stick module (potentiometer) | Yes, at-rest stick value is non-zero | Soldering |
| A face button needs hard presses or does nothing | Conductive rubber contact pad | Yes, the button indicator does not light | No solder, clip-in |
| L2 or R2 no longer reaches full pull | Trigger sensor or potentiometer | Yes, pressure reading stops short of full | Soldering |
| L2 or R2 pulls normally but gives no resistance | Adaptive trigger motor assembly | No, the API reads position, not force feedback | High, geared assembly |
| D-pad sticks in one direction | D-pad rubber pad or membrane | Yes, the direction stays lit | No solder, clip-in |
| Touchpad click does not register | Touchpad assembly | Yes, the touchpad button does not fire | Connector swap |
| Rumble feels weak, buzzy, or one-sided | Haptic actuator | No, the API cannot read haptic output | Connector or solder |
| Controller dies after a short session | Internal lithium-ion battery pack | No, the API cannot read battery health | Connector swap |
| Erratic behaviour after a spill | Liquid ingress or corrosion | No, requires visual inspection | Variable, often terminal |
Look at the third column. Five of these faults are electrical and a browser tester sees them directly. Four of them, adaptive trigger resistance, haptics, battery, and liquid damage, are invisible to the Gamepad API and need your eyes and hands.
That split is the entire reason a diagnose-first approach saves money.
Note the two trigger rows especially. They look similar to a frustrated player and they are completely different repairs. The tester is what separates them, and it does so in seconds.
How do I know whether to repair or replace a DualSense?
Repair when the controller has a single, identified, inexpensive fault and you own or will buy the tools. Replace when it carries several faults across different subsystems, physical damage to the board, or liquid ingress, because each of those multiplies parts and time past the cost of a working pad.
Run the decision in this order. First, diagnose the exact fault with a browser test plus a hands-on check for the four things the test cannot see. Second, count the faults.
One fault is a clear repair candidate. Two or more across different subsystems tilts toward replacement. Third, price that specific part against a replacement controller.
Here is where the DualSense genuinely differs from the older pad. A DualShock 4 sits at a low enough replacement price that a tool purchase can outweigh a single repair. A DualSense costs meaningfully more to replace, so the same repair clears the bar more easily and the threshold moves further in favour of fixing it.
If you were on the fence about buying a soldering iron for a DualShock 4, the same decision on a DualSense is easier to justify.
Be honest about your own tools and time, not just the sticker price of a part. A stick module is inexpensive, but it needs desoldering and resoldering, so a first repair also buys the iron and the half hour of learning.
If you already solder, that cost disappears and repair wins comfortably.
Never soldered before? Start with a clip-in conductive pad. It is a genuine repair, it fixes a real fault, and it needs no iron at all.
One more piece of honest arithmetic. If the fault is drift and you are going to open the pad anyway, consider whether to fit a drift-immune replacement rather than an identical potentiometer module.
The Hall-effect and TMR buying guide covers that trade-off, and the PS5 Hall-effect and TMR options page covers what actually fits a DualSense.
Why diagnose in a browser before buying parts?
Because the W3C Gamepad API reads the controller’s real input, so you confirm the fault rather than guessing it. The browser polls the pad many times a second and exposes the same raw stick positions, button states, and trigger pressures the controller sends to a console or a PC.
No install, no driver, and the input never leaves your machine. [1] [2]
That makes the test deterministic and free. You see exactly which stick drifts, which button fails to fire, and whether a trigger still reaches full pressure, before spending anything on parts.
A controller you can measure is a controller you can repair to a single part. A controller you only guess about is one you over-buy for.
The order matters more than most guides admit. Diagnose, then buy.
Reversing those two is how a person ends up with a stick module they did not need and a trigger fault they still have.
What can a browser tester see, and what can it not?
A browser tester sees everything the Gamepad API exposes: analog stick axes, digital button states, analog trigger pressure, D-pad direction, and the touchpad click. It cannot see anything the specification does not surface, which on a DualSense means battery health, haptic actuator output, adaptive trigger resistance, the microphone, and the light bar. [1]
This is worth stating plainly because it sets expectations correctly. Building JoyCheck meant working directly against what the Gamepad API actually reports across different pads, and the boundary is a specification limit rather than a browser limit or a tool limit. No browser tool of any kind can read a DualSense battery’s health, because the browser is never told.
So use the tester for what it is genuinely decisive about:
- Stick drift. At-rest axis values that sit away from zero, steadily, with your hands off. Confirmed by the dedicated stick drift test.
- Dead or failing buttons. An indicator that does not light on press, or needs abnormal force.
- Trigger range loss. A pressure reading that never reaches full travel.
- Stuck D-pad directions. A direction that stays lit after release.
- Deadzone behaviour. How much stick movement registers as nothing, explained in the controller deadzone guide.
Then check by hand for the rest: charge the pad and time a session for battery, feel the rumble for haptics, and pull each trigger for resistance.
Why do DualSense adaptive triggers fail, and can you fix them?
Adaptive triggers fail in two distinct ways, and separating them is the single most useful diagnostic step on a DualSense. Each trigger has both a position sensor that reports how far you pulled it, and a small geared motor assembly that pushes back against your finger. Those are different components with different failure modes.
If the trigger still reads a full 0 to 100 percent pressure sweep in the tester but no longer resists you, the sensor is fine and the motor assembly has failed. Common causes are a stripped gear, a jammed worm drive, or a broken motor mount. This is the harder repair, because the assembly is compact and geared, and a replacement trigger module is the realistic fix rather than a component-level repair.
If the trigger no longer reaches full pressure in the tester, or reports movement when you are not touching it, the sensor side has worn instead. That behaves much like stick drift and comes from the same class of wear on a carbon track.
The reason the adaptive trigger matters more on a DualSense than a trigger did on a DualShock 4 is complexity. A DualShock 4 trigger is a spring and a sensor. A DualSense trigger adds a motorised resistance mechanism, which is more moving parts in a small space and therefore more to go wrong.
It is also the part most likely to be worth a professional repair rather than a first solo attempt.
A practical note. A trigger that has lost resistance but still reports position correctly is fully playable in most games. It is a comfort and immersion loss, not a functional one.
That changes the urgency of the repair and is worth weighing before you open the pad.
What goes wrong with the DualSense haptic actuators?
The DualSense replaced the older rumble motors with voice-coil style haptic actuators, which produce sharper and more directional feedback. When they fail, the symptom is usually weak, buzzy, or one-sided feedback rather than a total silence, and the Gamepad API cannot confirm any of it.
Diagnose haptics by feel and by comparison. Run a game or a system feature that uses strong haptics, hold the controller lightly, and compare left against right. A clear imbalance points to one failed actuator rather than a system-wide fault.
If both are dead and everything else works, suspect the cable or connector feeding them before you suspect two simultaneous actuator failures.
Actuator replacement is a connector or soldering job depending on how it is mounted, and it is a lower-priority repair than sticks or triggers because it does not affect input accuracy at all. A DualSense with dead haptics still plays correctly. Weigh that before spending on the part.
Which replacement parts does a DualSense use?
The replaceable wear parts are the analog stick modules, the adaptive trigger assemblies, the conductive rubber pads for the face buttons and D-pad, the haptic actuators, the ribbon and flex cables, the internal lithium-ion battery pack, and the touchpad assembly. iFixit documents the disassembly order, the screw types, and the cable routing. [3]
Match the part to the confirmed fault rather than buying a general repair kit. Kits are convenient but they encourage replacing components that were never broken, which adds risk to every extra connector you disturb.
| Part | Fault it fixes | Solder needed | Notes |
|---|---|---|---|
| Analog stick module | Drift, off-centre rest position | Yes | Consider a Hall-effect or TMR module instead of like-for-like |
| Adaptive trigger assembly | Lost resistance, jammed pull | Usually | Most complex common repair on the pad |
| Conductive rubber pads | Unresponsive or hard face buttons and D-pad | No | Cheapest repair, good first job |
| Haptic actuator | Weak or one-sided feedback | Sometimes | Cosmetic to gameplay, low priority |
| Battery pack | Short session life | No | Connector swap, respect lithium handling |
| Ribbon and flex cables | Intermittent or dead subsections | No | Often just unseated rather than failed |
| Touchpad assembly | Click not registering | No | Connector swap |
If you are replacing a stick module, the analog stick replacement guide walks the desolder and reseat process in detail, and it applies across pads rather than only to one console.
What tools do I need to repair a PS5 controller?
For no-solder repairs, a Phillips screwdriver set, plastic opening picks or a spudger, and tweezers. That covers conductive pads, the battery, the touchpad, and reseating cables. For stick modules and trigger sensors, add a temperature-controlled soldering iron, solder, and desoldering braid or a desoldering pump.
The tool list is the honest hidden cost of self-repair, and it is a one-time cost rather than a per-repair one. After the first job, every later repair is just the part. That is exactly why the repair-versus-replace maths improves the more pads you keep alive.
Two cautions worth stating.
First, work on a non-conductive surface and discharge static before touching the board. Second, the battery is a lithium pack, so never puncture, bend, or crush it during removal, and do not put a damaged pack back in service.
Is the DualSense Edge easier to repair?
For stick drift, yes, and it is the only PlayStation controller where that is genuinely true. The DualSense Edge uses stick modules that Sony sells as a separate replaceable accessory, so a drifting Edge stick becomes a no-solder swap instead of a desoldering job. [4] [6] [7]
That single design decision changes the ownership maths. On a standard DualSense, drift means either soldering, paying someone, or replacing the pad. On an Edge, drift means buying a module and swapping it in minutes with no iron at all.
If you have had multiple pads die of drift, that is a real argument for the Edge despite its higher purchase price.
Do not over-extend the conclusion. Edge triggers, haptics, battery, and conductive pads are no easier than the standard DualSense, and the Edge costs considerably more up front. The modular stick is one strong advantage, not a general repairability upgrade across the whole controller.
What about PS5 controller stick drift specifically?
Drift is the single most common DualSense fault, and it has its own dedicated guide on this site rather than a summary here. Confirm it by resting the pad flat and reading the at-rest axis values in a tester. A steady non-zero reading with your hands off is hardware drift, not a software or calibration problem.
For the numeric thresholds that separate normal noise from a genuine fault, the recalibration steps that are worth trying first, and the full fix options including Hall-effect and TMR replacements, read the PS5 controller stick drift guide. If you want to check calibration behaviour rather than drift specifically, the DualSense calibration walkthrough and the calibration tester cover that path.
What is the official Sony repair route?
Sony handles DualSense repair and replacement through its official PlayStation hardware support channels, and an in-warranty fault is the clearest case for using it rather than opening the pad yourself. [5]
Check warranty status before anything else, because opening the controller yourself will generally void remaining cover. If the pad is in warranty and the fault is a manufacturing defect rather than wear, the official route costs you nothing but time, and self-repair actively costs you the warranty.
Out of warranty, compare the quoted service cost against the price of the one part you actually need. For a single inexpensive fault on a pad you can open, self-repair usually wins on value. For a multi-fault controller, or one you would rather not disassemble, the official route removes the risk of turning a one-part problem into a two-part problem.
For general connection and firmware faults that are not hardware at all, start with the DualSense troubleshooting guide before considering any repair.
When is a PS5 controller beyond repair?
A DualSense is realistically beyond repair when it has liquid ingress with visible corrosion, a cracked or delaminated mainboard, several simultaneous faults across different subsystems, or damage to a connector seat on the board itself. Each of those turns a part swap into board-level work.
Liquid damage deserves its own line. A controller that behaves erratically after a spill is not reporting a single failed part but a board with corrosion spreading between traces. Cleaning can sometimes recover it, but the failure rate is high and the fault often returns weeks later.
Time spent there is usually better spent on a replacement.
The other clear signal is fault count. One fault is a repair. Two faults in the same subsystem, for example both sticks worn from even use, is still a sensible repair because you are inside the pad once.
Two faults across different subsystems, such as a dead trigger motor plus a failing battery, is where a replacement usually wins.
If you do replace the pad, keep the old one. A controller that is beyond economic repair is still a donor for conductive pads, cables, and a touchpad, and those are exactly the parts that fail on the next controller.
For a second pad on an older console, the PS4 controller repair guide covers the DualShock 4 equivalents, and the controller battery and charging guide covers the charging behaviour that shortens pack life in the first place.
DualSense teardown and parts references
- W3C, Gamepad API specification. https://www.w3.org/TR/gamepad/
- MDN Web Docs, Gamepad API. https://developer.mozilla.org/en-US/docs/Web/API/Gamepad_API
- iFixit, Sony DualSense controller teardown and repair documentation. https://www.ifixit.com/Device/DualSense
- iFixit, Sony DualSense Edge controller documentation. https://www.ifixit.com/Device/DualSense_Edge
- Sony Interactive Entertainment, PlayStation hardware support. https://www.playstation.com/en-us/support/hardware/
- Sony Interactive Entertainment, DualSense Edge wireless controller. https://www.playstation.com/en-us/accessories/dualsense-edge-wireless-controller/
- Sony Interactive Entertainment, Stick module for DualSense Edge wireless controller. https://direct.playstation.com/en-us/buy-accessories/stick-module-for-dualsense-edge-wireless-controller
Is it worth repairing a PS5 controller?
More often than it was worth repairing a DualShock 4, because a DualSense costs more to replace. A single well-understood fault, a worn stick module, a failed adaptive trigger, a dead conductive pad, or a tired battery, is usually cheaper to fix than to replace the pad. The calculation turns once a controller has two or more faults across different subsystems, a cracked board, or liquid damage. Diagnose the exact fault first, then price that one part against a replacement controller rather than guessing.
Why do my DualSense adaptive triggers stop working?
Adaptive triggers are the most mechanically complex part of a DualSense. Each trigger has its own small geared motor assembly that pushes back against your finger, and that assembly can strip, jam, or lose its drive. A trigger that still reads full pressure range in a browser tester but no longer resists you has an actuator fault, not a sensor fault. A trigger that no longer reaches full range in the tester has a sensor or potentiometer fault instead. The distinction matters because they are different parts and different repairs.
What parts can you replace in a DualSense?
The common wear parts are all replaceable with the right tools: the left and right analog stick modules, the adaptive trigger assemblies, the conductive rubber pads under the face buttons and D-pad, the haptic actuators, the ribbon and flex cables, the internal lithium-ion battery pack, and the touchpad assembly. Stick modules and trigger sensors need soldering. Rubber pads, the battery, and most cable connections are clip-in or connector swaps. iFixit publishes a DualSense teardown that documents the disassembly order and the screw types.
How much does a PS5 controller repair cost?
Parts are usually the smaller share of the cost. Stick modules and conductive pads sit at the low end, adaptive trigger assemblies and haptic actuators sit higher because they are more complex, and a battery pack sits in between. Hall-effect and TMR replacement stick modules cost more than the standard potentiometer modules but remove the wear path that causes drift. Tools are a one-time cost: a Phillips bit set, a spudger or opening picks, and a soldering iron for stick and trigger work. Because a DualSense costs more to replace than a DualShock 4, the repair-versus-replace threshold sits further in favour of repair.
Can a browser test tell me what is wrong with my DualSense?
It can localise most electrical faults but not the mechanical or chemical ones. A browser tester reads the W3C Gamepad API, which exposes analog stick position, button states, trigger pressure, D-pad input, and the touchpad click. So it confirms stick drift, dead or sticky buttons, a trigger that no longer reaches full range, and a stuck D-pad direction. It cannot read battery health, haptic actuator wear, adaptive trigger resistance, microphone faults, or internal liquid damage, because the Gamepad API does not expose them. Use the test to narrow the electrical faults, then inspect by hand for the rest.
Is the DualSense Edge easier to repair than a standard DualSense?
For stick drift specifically, yes, and it is the only PlayStation controller where that is true. The DualSense Edge uses replaceable stick modules that Sony sells as a separate accessory, so a drifting Edge stick is a no-solder swap rather than a desoldering job. That does not extend to the rest of the controller. Edge triggers, haptics, battery, and pads are as involved as the standard DualSense, and the Edge costs considerably more up front. Treat the modular stick as one strong repair advantage, not a general one.
Does Sony repair PS5 controllers?
Sony handles DualSense repair and replacement through its official PlayStation hardware support channels, and an in-warranty fault is the clearest case for using that route rather than opening the controller yourself. Opening the pad yourself will generally void remaining warranty cover, so check your warranty status before you reach for a screwdriver. Out of warranty, compare Sony's quoted service cost against the price of the specific part you need, because for a single cheap fault self-repair is usually the better value.
Why is my PS5 controller drifting on its own?
Stick drift on a DualSense is almost always a worn analog stick module. The stick uses a potentiometer with a carbon track, and that track wears thin in the arc you use most until the stick reports movement with your thumb off it. Confirm it by resting the controller flat and reading the at-rest stick value in a browser tester. A steady non-zero reading is hardware drift, and a module swap, or a Hall-effect or TMR replacement, is the durable fix rather than recalibration. The dedicated PS5 stick drift guide covers the numeric bands and the fix options in full.
Pinpoint the part before you order
Confirm drift, dead buttons and trigger travel in your browser.